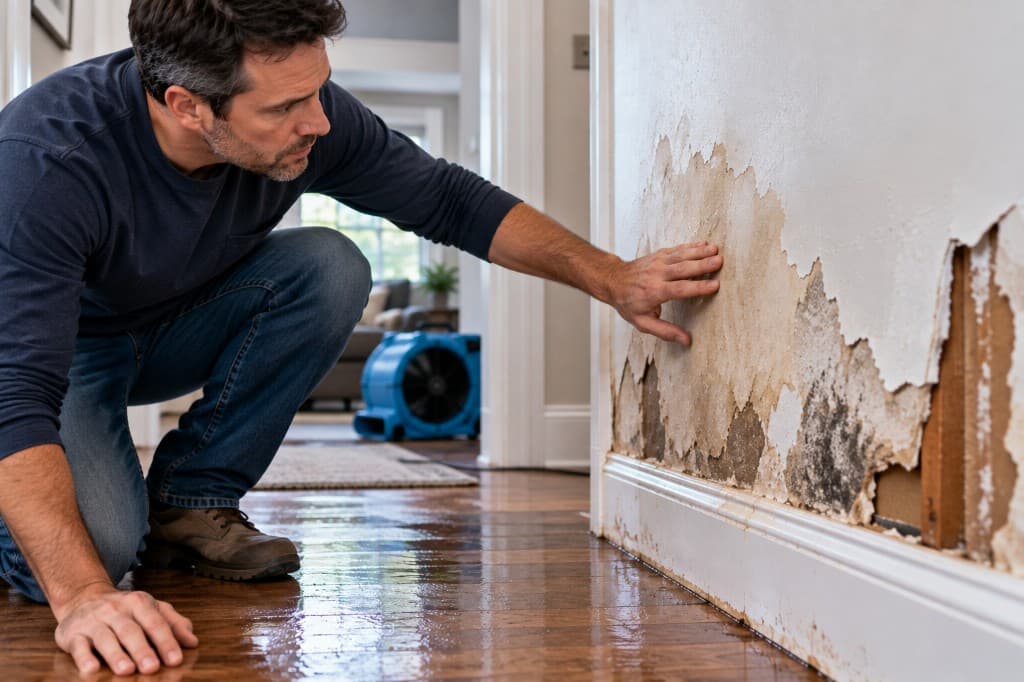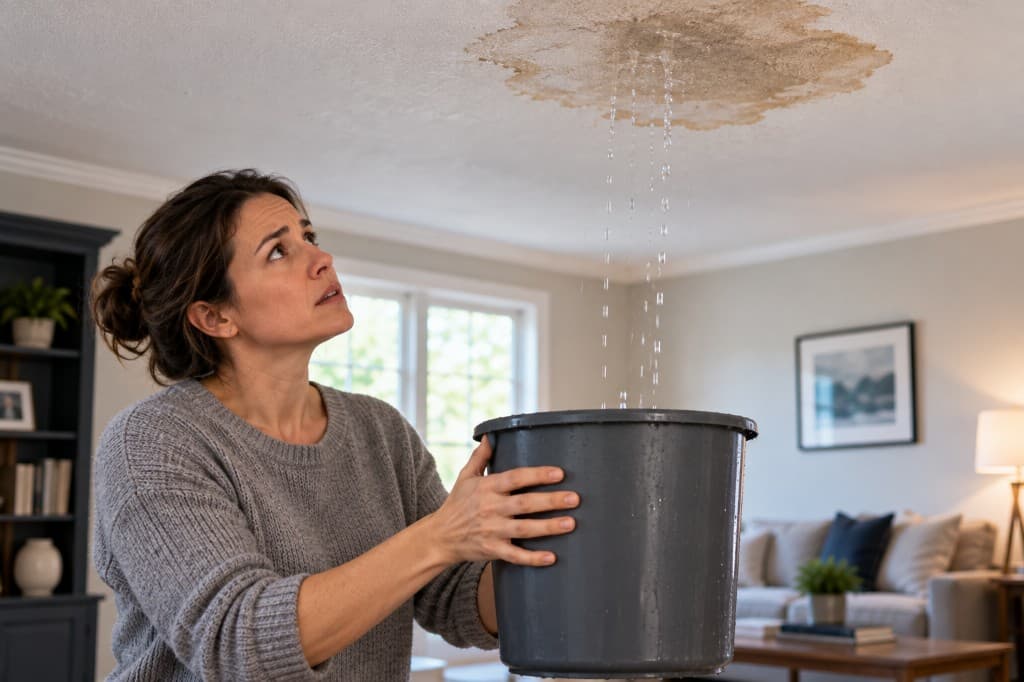
A wall stain rarely starts as a wall problem. It starts as a leak, a drip, a slow seep, or a small overflow that found a hidden path and stayed there longer than anyone noticed.
Water behind drywall often reveals itself in an ordinary moment. A brown ring shows up near the ceiling. Paint starts to bubble beside a shower. A baseboard lifts a little on one side. The room smells damp even though the wall feels dry to the touch. The first instinct is usually to wipe it, patch it, or poke a hole and hope for the best.
That's the wrong mindset.
The right mindset is simpler. Three questions matter right away. Where is the water coming from? How far did it spread inside the wall cavity? Is this a dry-it, open-it, or call-a-pro situation?
Drywall is forgiving on the surface and unforgiving inside. The face can look fine while the core stays damp, the paper holds moisture, and insulation traps humid air in the stud bay. The clock matters, but not in the cartoon version most articles give. The usual “48 hours” advice is useful, but it isn't a magic switch that tells anyone exactly what's safe and what isn't.
This is a decision article. It gives a clean path for what to check, what to do first, when drying in place is reasonable, and when opening the wall is the smarter move.
You Just Found Water Behind Drywall
A worried homeowner usually sees one of four things first. A spreading ceiling stain. A soft paint bubble. Trim pulling away from the wall. Or a musty odor that wasn't there yesterday.
None of those signs tells the full story. They only tell where moisture became visible. Water behind drywall often spreads beyond the stain, especially when it moves along paper facing, framing, or insulation inside the cavity.
Start with three practical questions
Before anyone grabs tools, these are the only questions worth focusing on:
- Find the source: Is this coming from plumbing, a roof leak, a window failure, an upstairs bathroom, or HVAC condensation?
- Judge the spread: Is the issue limited to one spot, or is moisture likely moving down a stud bay or across the bottom plate?
- Choose the response: Can the wall likely dry in place, does it need to be opened, or is it already beyond sensible DIY?
A calm decision beats a fast guess.
Practical rule: Treat every visible drywall stain as a clue, not a boundary line.
Why the hidden side matters more than the visible side
The hard part with water behind drywall is that the wall cavity hides the core problem. Drywall can hold moisture after the surface looks dry because water stays trapped in the gypsum core and behind the paper facing. In a University of Toronto study, drying time to reach steady state after saturation was 5.8 days for unpainted drywall, 4.3 days for painted drywall, and 3.2 days for moisture-resistant drywall, a spread of nearly 2.6 days across common materials. That's why visual inspection alone isn't enough and why moisture measurement matters more than a dry-looking surface (University of Toronto drywall drying findings).
This is also why a wall can fool people. The paint may feel normal while the cavity is still wet.
Don't default to either panic or denial
Punching random holes into a wall can create extra repairs without solving the moisture problem. Ignoring it because the stain stopped growing is just as risky.
The better move is controlled triage. Stop the source, check the extent, and make a deliberate call on drying versus opening. That's how hidden damage stays limited instead of turning into a larger restoration job.
How Water Gets Trapped Inside a Wall
You can have a wall that looks fine from the room side and is still holding water where it counts. That happens because the wall cavity hides the path water took and the materials inside it do a good job of slowing dry-out.
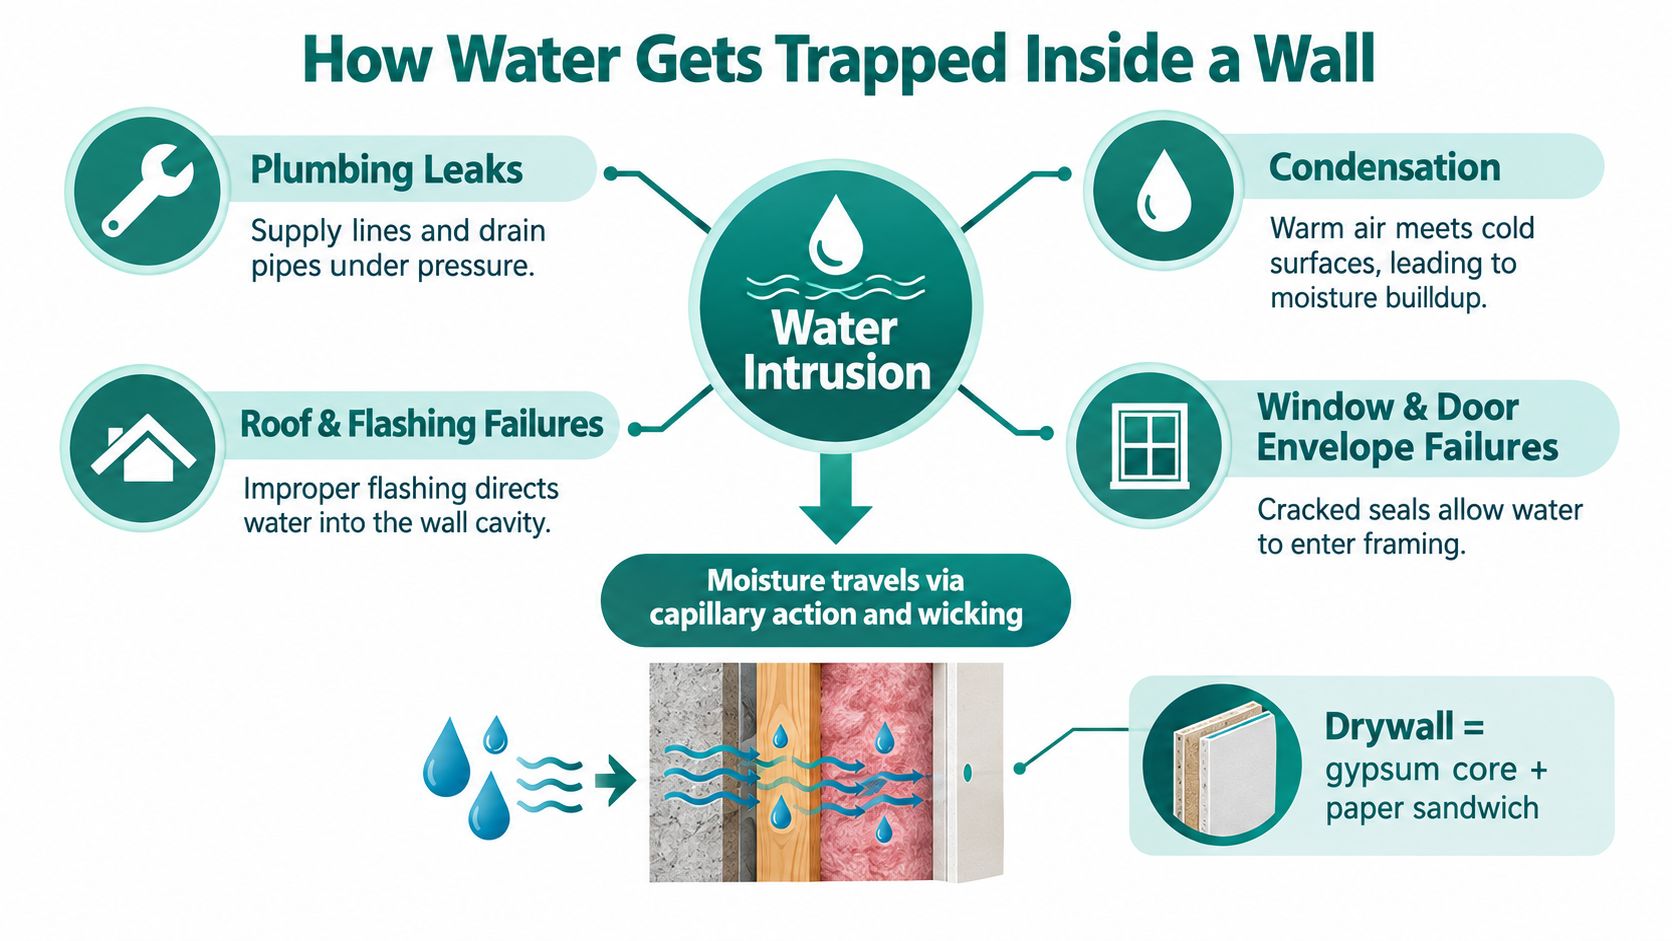
Drywall is a gypsum core faced with paper. Both materials react to moisture. The paper can wick water sideways and upward, and the gypsum core can hold it longer than the painted surface suggests. That is why the visible stain is often just the place where moisture finally showed itself, not the full wet area.
The usual paths water takes
Water behind drywall usually arrives in predictable ways:
- Plumbing leaks: Supply lines, drain lines, shower valves, tub overflows, and fittings inside the wall cavity.
- Roof or flashing failures: Water enters above, runs along framing, and appears much lower than the entry point.
- Window and door leaks: Failed sealant or flashing lets rain into the wall assembly.
- HVAC condensation: Cold ducts, air handlers, or drain problems can leave repeated moisture inside finished walls.
- Appliance line failures: Refrigerator, dishwasher, washing machine, and water-heater leaks often wet the wall from the back side.
Water rarely drops straight down in a neat line. It follows gravity, wood grain, fasteners, insulation, and any gap that gives it an easier path.
Why the cavity stays wet
The inside of a wall is a poor place to dry anything.
Insulation blocks airflow and holds moisture against drywall and framing. Stud bays have very little air movement unless the wall is opened. Paint on the room side can slow drying in one direction, while the back of the drywall stays damp against insulation or wood. A wall can feel normal to the touch and still have wet material inside the cavity.
This is the part many homeowners miss. The decision is not based on the stain alone. It is based on what likely got wet behind it, how long water sat there, and whether air can realistically reach those materials.
Materials inside the wall do not dry the same way
Standard paper-faced drywall is usually the least forgiving. Moisture-resistant board can still absorb water and still fail if it stays wet. Plaster often hides moisture longer and may loosen from its base in a different pattern. Wet insulation is its own problem because even if the drywall eventually dries, the insulation can keep the cavity damp.
A dry painted surface proves very little.
That is why the 24 to 48 hour rule needs context. A small, clean water event on an uninsulated interior wall may dry in place. A slow leak in an insulated exterior wall, or water that entered from above and ran down multiple bays, often needs the wall opened so trapped moisture can leave.
Signs That Water Is Hiding Behind Drywall
The obvious sign is a stain. The better signs are the smaller ones around it.
What to look for in the room
Start with the wall and the trim around it. Water behind drywall often shows up through finish changes before the surface feels wet.
- Discoloration: Yellow or brown marks with defined edges usually mean moisture moved and then paused.
- Paint changes: Bubbling, peeling, or flaking paint in one patch is more suspicious than general wear.
- Joint movement: Swollen tape joints and small ridges along seams often show that the board expanded.
- Trim separation: Baseboards or crown that pull away can mean the drywall behind them softened.
Then check the nearby floor. Lifted thresholds, warped flooring edges, or unusual swelling near the base of the wall often point to a wall cavity issue that moved downward.
What to feel and smell
A palm test helps, but only if it's done carefully. Press lightly for softness, a slight bulge, or a cooler patch compared with the wall beside it.
The smell test matters more than you might think. A persistent musty or earthy odor is often the first reliable clue that moisture is sitting where paint can't hide it.
For a more systematic inspection, room-by-room signs and leak patterns are covered in this guide to detecting water leaks in walls.
The small clues people miss
These clues don't always get linked back to water, but they should:
- Fastener pops: Screws or nails pushing through finished drywall
- Rust bleed: Brownish marks where corner bead or fasteners are starting to corrode
- Recurring condensation: One wall section staying cooler and collecting moisture
- Humidity that feels off: The room feels damp without an obvious reason
A moisture meter can help, but it should be used for comparison, not blind confidence. A pin or pinless meter lets a homeowner compare the suspect wall to a known dry wall nearby. If the suspect area reads higher than the room's dry baseline, the wall deserves more investigation. That's especially true near the baseboard and around plumbing walls.
Immediate Steps After You Discover Wet Drywall
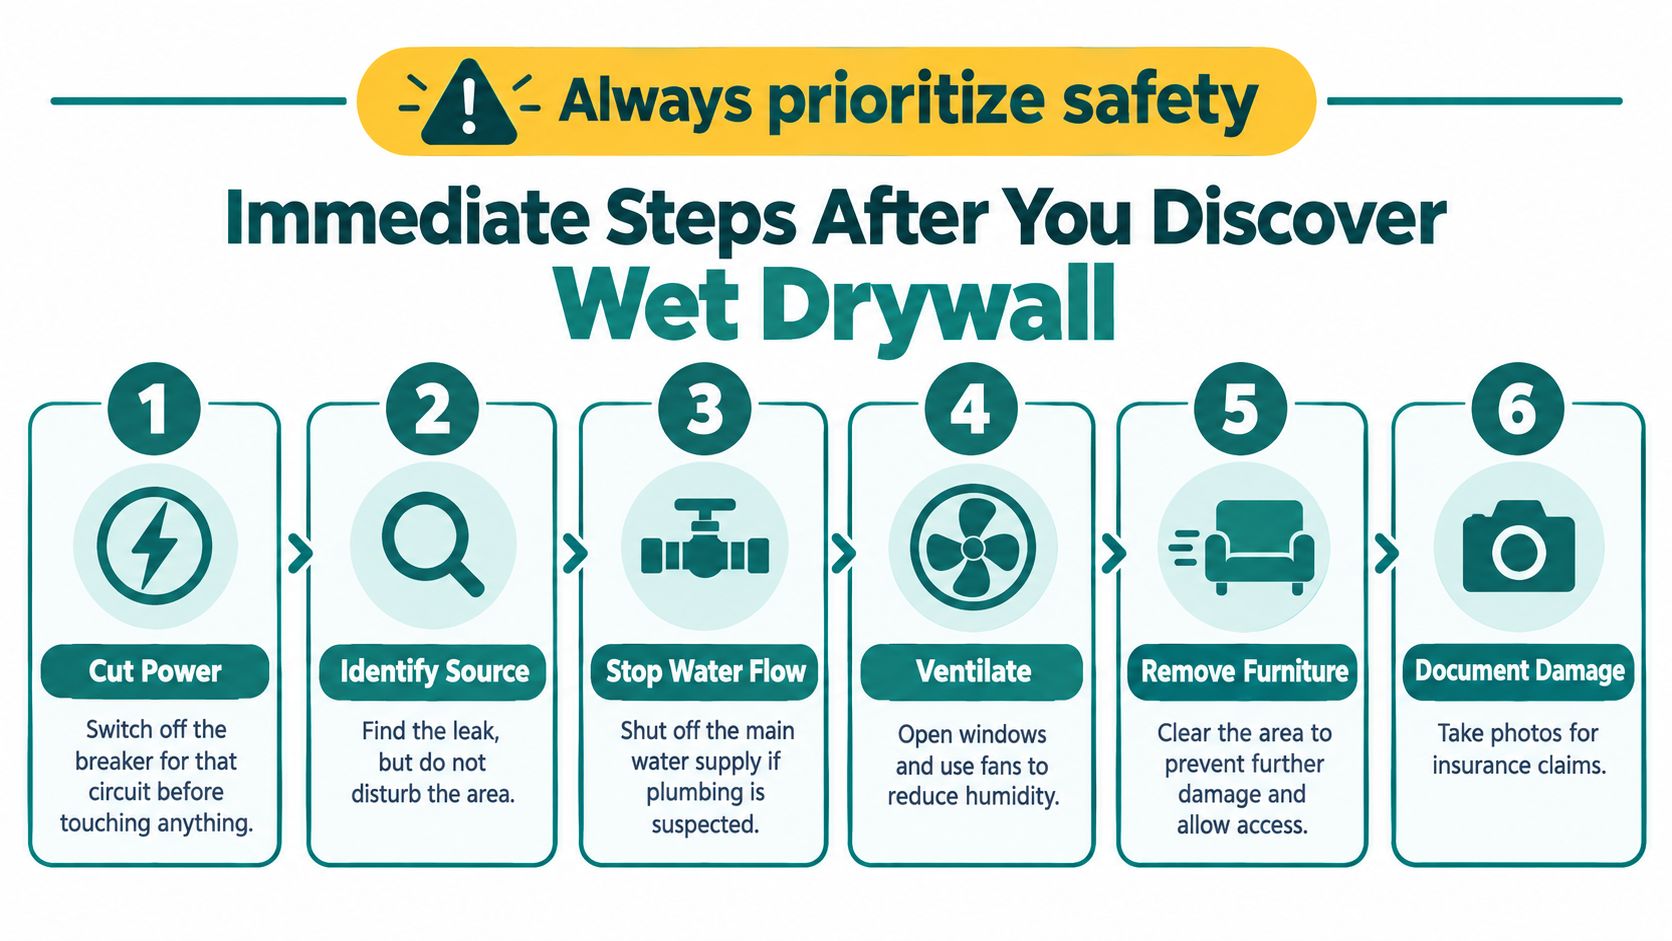
The first move is safety. Cleanup comes second.
Do these in order
If the wet area is near outlets, switches, light fixtures, or wiring, turn off the breaker for that circuit before touching the wall. No wall inspection is worth mixing wet materials with live electricity.
Then stop the water source if it can be done safely. Shut off the fixture valve, close the main if needed, catch active drips, and keep more water from feeding the same cavity.
Use this order:
- Cut power to the affected area
- Stop the water
- Protect the room
- Document before moving too much
- Start room drying
Protect the evidence and the contents
Take photos and video from several angles before trim gets pulled off or furniture gets moved. Include the stain pattern, floor condition, any dripping, and nearby fixtures. For insurance, a written log helps too. Note when the damage was discovered, what was wet, and what steps were taken to limit further damage.
Move furniture, rugs, electronics, and stored items away from the wall. Curtains should be lifted off the floor. If baseboards are already loose or bulging, remove them carefully and save the pieces if they're reusable.
Wet drywall near wiring changes the job immediately. Shut the circuit off first.
Start drying the room, not the guess
Open windows only if outdoor conditions help. In humid weather, a dehumidifier usually matters more than an open window. Use fans to move air across the room, not directly into random holes drilled into the wall.
That last mistake is common. People drill first and think airflow alone will solve everything. Sometimes it helps. Sometimes it just creates extra patching while the insulation behind the board stays wet.
The wall should be opened only after there's a reason to open it. The wall should be dried in place only after there's a reason to trust that approach.
Dry It Out or Open the Wall
You pulled back a baseboard, saw damp drywall, and now you have to make one decision fast. Try to dry the wall as-is, or cut it open and see what the cavity is holding.
Do not decide by the stain alone. The question is inside the wall. Drywall can look acceptable while insulation stays soaked, framing holds moisture, and the cavity never gets enough air exchange to dry correctly.
When drying in place makes sense
Drying in place is reasonable when the leak was stopped quickly, the water source was clean, the drywall is still firm, and there is a good reason to believe the cavity did not stay wet long. Seams should be tight. The face paper should still be bonded. You should not see bulging, softness, crumbling, or spreading brown stains.
The often-repeated 24 to 48 hour window needs context. The U.S. EPA says mold growth generally can often be prevented if wet materials are dried within that range. That is useful guidance, but it is not a magic deadline where hour 49 automatically means tear-out. What matters is whether the materials inside the wall are drying, not whether the calendar says they should be.
If you are trying to save the wall, follow a proven process for how to dry wet drywall. Use that approach only when the wall still has a realistic path to dry all the way through.
When opening the wall is the better call
Open the wall when the cavity is likely holding water or moisture with nowhere to go.
That usually means wet insulation, a leak that may have been active for more than a day or two, repeated wetting in the same area, water from a contaminated source, or drywall that has already lost strength. Dense finishes also change the decision. Tile, cabinets, paneling, and vapor-slow layers can trap moisture long after the surface feels drier.
The National Institutes of Health guidance is direct on this point. Wallboard may be dried in place only if there is no water stain or obvious swelling and the seams are intact. If it cannot be dried within 48 hours, the guidance says to remove and discard the wallboard below 12 inches above the water mark and remove damp insulation as well (NIH wallboard remediation guidance).
That is the line many homeowners miss. A wall cavity with wet insulation is rarely a good candidate for a wait-and-see approach.
Dry-In-Place vs. Open the Wall Decision Criteria
| Condition Observed | Dry-In-Place Likely | Open the Wall |
|---|---|---|
| Small clean-water event, caught quickly | Yes | Sometimes unnecessary |
| Surface intact, seams intact, no swelling | Yes | No |
| Insulation likely wet inside cavity | Unreliable | Yes |
| Repeated leak or unknown duration | No | Yes |
| Gray water, sewage, or contaminated source | No | Yes |
| Drywall is soft, crumbling, or bulging | No | Yes |
| Cabinetry, tile, or dense finishes trap moisture | Less reliable | Often yes |
Drying in place only works when the cavity can actually dry. If it cannot, opening the wall early usually saves time, money, and a larger repair later.
What Restoration and Repair Actually Involves
Professional water damage work is less mysterious than people think. It's a sequence, and the order matters.
The mitigation side
First, the source gets fixed or isolated. There's no point drying a wall that's still being fed by a pipe, flashing failure, or condensate line.
After that, the wet area gets mapped and documented. Standing water is removed if present. Baseboards come off. If the cavity needs access, drywall is cut in clean sections rather than smashed open. Wet insulation is removed because it slows drying and usually isn't worth trying to save once soaked.
Anyone trying to understand the first phase of this work should read this explanation of what water mitigation means. It helps separate emergency drying from finish repair.
The drying and rebuild side
Once the wall is open enough to dry correctly, air movement and dehumidification do the heavy lifting. The cavity, framing, and remaining drywall edges are dried before anything gets closed back up.
Then comes the repair work:
- Drywall patching: New board is cut to fit the opening.
- Tape and compound: Joints are taped and finished in multiple coats.
- Surface prep: Sanding, priming, and texture matching happen before paint.
- Finish restoration: Painters usually repaint from corner to corner for an even sheen.
- Reinstallation: Baseboards, outlet covers, and removed trim go back on last.
Why “just patch it” often backfires
The weak point in DIY drywall repair isn't usually the patch itself. It's closing the wall before the cavity is completely dry.
Recent building-environment literature points to a more complicated reality than a simple timer rule. Some drywall studies found no mold after one week of incubation, while others found microscopic growth within hours and visible growth within days under favorable conditions. The review also stresses that conditions like humidity, temperature, material type, and prior spore presence change outcomes (review of water intrusion and building material response).
That's why good restoration work verifies dryness before rebuild. It doesn't guess.
Costs, Insurance, and Documentation
The cost question is fair. The problem is that the answer depends on whether the job is a drying job, a demo-and-dry job, or a repair-after-opening job. A wall that dries in place is one category. A wall with soaked insulation and hidden spread is another.
What usually drives the bill
The main cost drivers are scope and access:
- Drying-only work: Moisture checks, equipment setup, monitoring, and limited trim removal
- Partial wall opening: Drywall cuts, insulation removal, cavity drying, and disposal
- Full finish repair: New drywall, taping, mudding, sanding, priming, painting, and trim replacement
A textured wall, built-in cabinet, tiled area, or hard-to-match finish usually pushes the repair side up because the labor increases.
Typical Cost Ranges for Drywall Water Damage Restoration
| Repair Scenario | Typical Cost Range | What Is Included |
|---|---|---|
| Drying only | Varies by scope | Moisture mapping, airflow, dehumidification, monitoring |
| Partial drywall replacement | Varies by access and finish | Demo, insulation removal if needed, drying, patching |
| Full cavity restoration and finish repair | Varies widely | Open wall, remove wet materials, dry cavity, rebuild and repaint |
No honest advisor should slap one price on all three. The right estimate starts after the wet area and access limits are known.
What insurance usually cares about
Homeowners insurance often treats sudden and accidental water events differently from slow leaks. Burst pipes, supply line failures, and certain appliance leaks are often handled more favorably than long-term seepage or ignored maintenance issues. Flood damage is usually its own category and often needs separate coverage.
The documentation should make the timeline obvious:
- Time-stamped photos and video
- A written discovery log
- Invoices for emergency plumbing or mitigation
- Notes on what was moved or removed
- Any moisture readings or drying records provided by a contractor
One smart insurance habit
Talk to the insurer before signing a large restoration contract if there's any chance of a claim. That doesn't mean waiting to stop ongoing damage. It means documenting first, mitigating promptly, and making sure the scope lines up with what's being reported.
A calm file with photos, dates, and invoices usually travels better than a rushed explanation after the wall has already been closed.
Preventing Water Behind Drywall From Coming Back
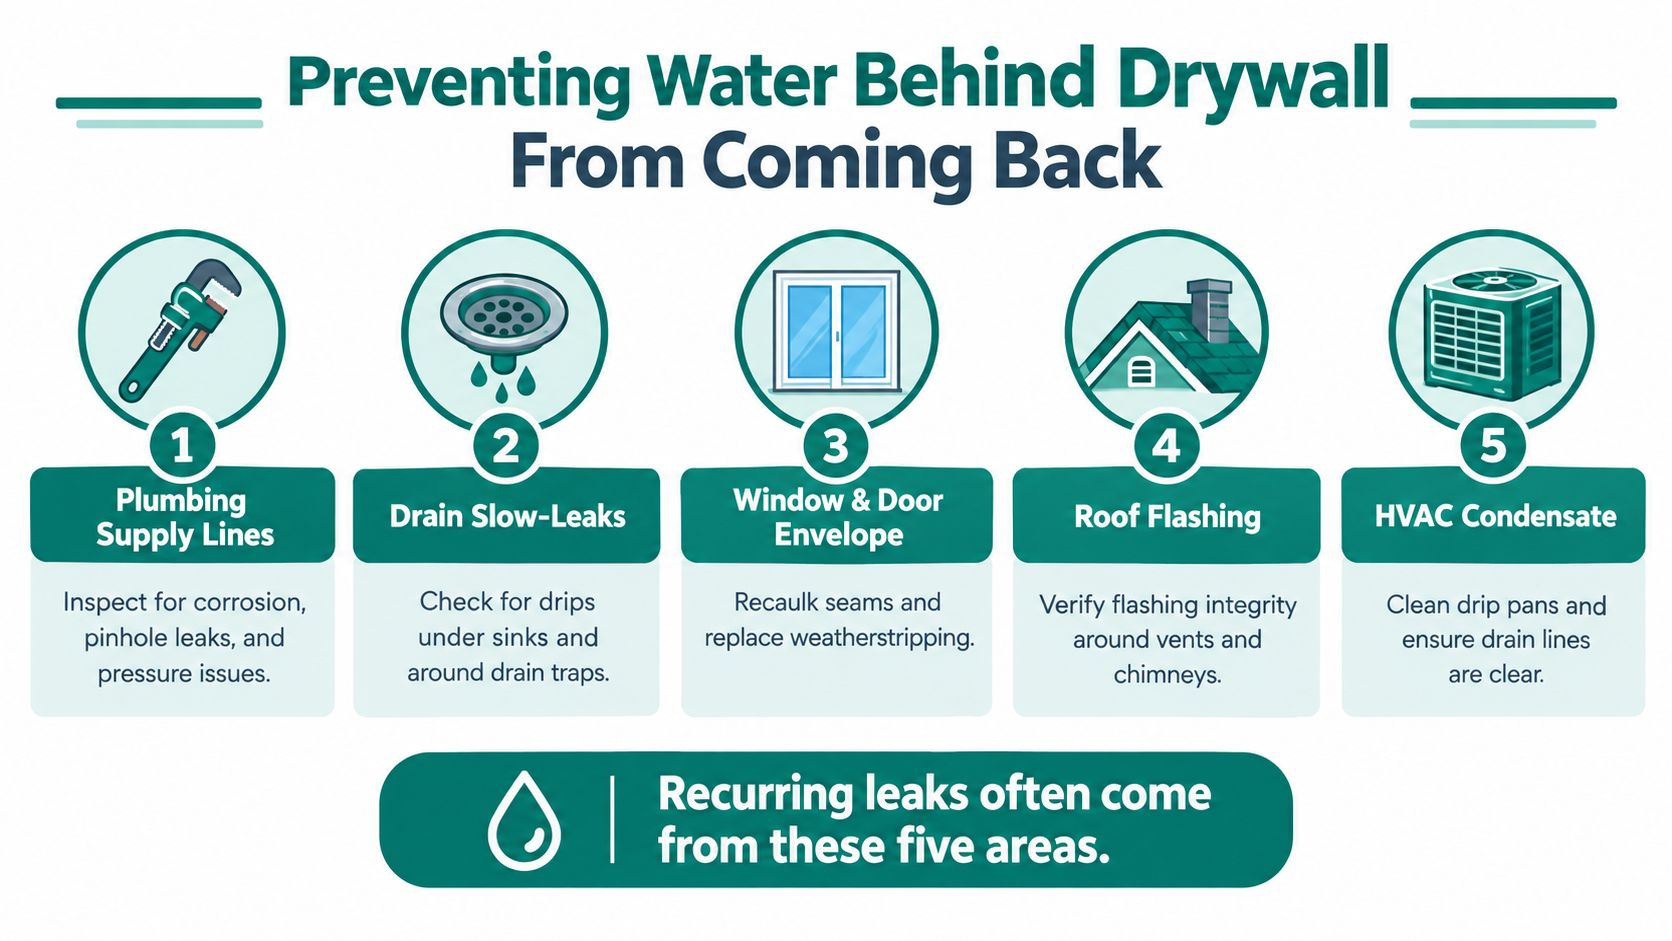
The cheapest water damage repair is the one that never gets past the trim line. Recurring wall leaks usually come from the same few places, and most of them give warning before they become major repairs.
Focus on the repeat offenders
A prevention plan should stay narrow and practical:
- Plumbing supply lines: Look for corrosion, drips, and stress at connections behind sinks, toilets, and appliances.
- Drain slow-leaks: Check traps, shutoff areas, and cabinet bottoms for recurring dampness.
- Window and door edges: Watch for failed caulk lines, staining, and trim swelling after heavy rain.
- Roof flashing areas: Interior wall stains near exterior walls often trace back to a roof detail, not the wall itself.
- HVAC condensate lines: Blocked drains and wet pans can feed hidden moisture into nearby framing.
The habits that actually help
Most prevention is boring. That's why it works.
Tag shutoff valves so they're easy to find under pressure. Check under sinks and around water heaters regularly. Watch for unexplained jumps in the water bill. Replace aging supply hoses before they fail. Clear condensate drains and pans as part of routine seasonal service.
Leak-detection sensors also make sense in high-risk spots like behind appliances, near upstairs bathrooms, and at the base of utility walls. The job of these devices isn't to stop all water damage. It's to shorten the time between leak and discovery.
Don't trust “dry” after a recurring leak
Many repeat problems begin here. A wall that dried once after a small leak may still become the weak point if the same area gets rewetted later. Newer building-environment findings note that damp buildings are common and that fungal growth is driven not only by major one-time events but also by repeated wetting and long-term moisture accumulation. The same literature also notes that dormant spores on building materials can survive dry periods and resume growth when rewetted (building moisture and recurring wetting review).
That's why recurring leaks deserve a lower threshold for opening and checking the cavity. The second leak is rarely just another first leak.
A simple seasonal rhythm helps. Check roofs and gutters in spring. Pay attention to pipes and freeze-prone areas before winter. Keep an eye on appliance connections year-round. Small, repeated attention is what keeps water behind drywall from becoming a hidden repair cycle.
PostDamage helps homeowners, landlords, and small businesses figure out what to do after water damage, including situations where a wall looks minor on the surface but may be wet inside. If the next step isn't clear, PostDamage offers practical guidance and a simple way to request the right kind of help without turning one leak into five sales calls.